有一台内网的Windows Server服务器,搭建Jupyter、Vscode remote以供内网客户端使用。
简介
Jupyter Notebook是一个开源的Web应用程序,可以创建和共享包含实时代码,方程式,可视化和说明文本的文档。主要就是用来写python。比较方便。
安装
首先安装python,并保证添加到PATH中。
然后打开cmd执行
pip install jupyter # 使用官方源
pip install -i https://pypi.douban.com/simple/ jupyter  # 使用豆瓣源,上面运行不了则用这个
等待安装完成。
运行
jupyter notebook
打开Jupyter。正常将会显示以下内容
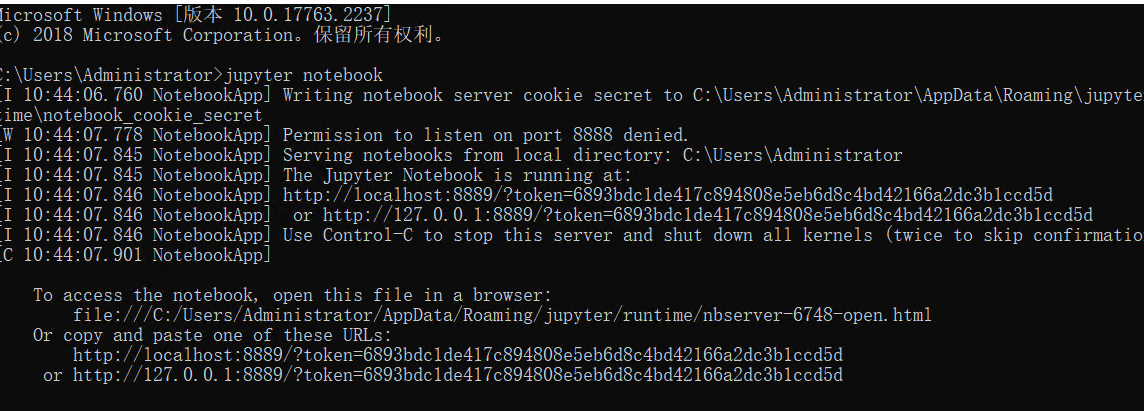
并弹出网页。
如需在内网其他机器访问Jupyter,请复制最后一行链接,将其中的127.0.0.1改成Jupyter所在服务器的IP地址,注意带有token。另,每次重新启动Jupyter都会改变token。
配置Jupyter,更改默认位置和允许远程访问
自定义:输入jupyter notebook --generate-config,生成配置文件:

打开文件,可以看到许多设置,以下是一个修改示例。(记得取消注释)
## 修改默认工作目录为`C:\Github\jupyter`:

## The directory to use for notebooks and kernels.
c.NotebookApp.notebook_dir = 'C:\Github\jupyter''

## 允许远程访问

#  Local IP addresses (such as 127.0.0.1 and ::1) are allowed as local, along
#  with hostnames configured in local_hostnames.
c.NotebookApp.allow_remote_access = True

## 监听所有IP的访问

## The IP address the notebook server will listen on.
c.NotebookApp.ip = '*'

## 允许访问

## Set the kernel's IP address [default localhost]. If the IP address is
#  something other than localhost, then Consoles on other machines will be able
#  to connect to the Kernel, so be careful!
c.ConnectionFileMixin.ip = '*'
之后就可以愉快的远程访问了。
使用密码访问
需要先新建密码,更多请看参考链接3
输入 ipython,进入交互命令行:
>>>from notebook.auth import passwd
>>>passwd
Enter passwd:				# 这里输入你的密码
Verify passwd:				#重复输入密码
>>>argon2:$argon2id$v=19$m=10240,t=10,p=8$YiTF3tI7ZWECTbNaa5VZtA$kaU+xbQSsMaZsH98sqoaGg  #复制这段秘钥
修改配置文件:
c.NotebookApp.password ='argon2:$argon2id$v=19$m=10240,t=10,p=8$YiTF3tI7ZWECTbNaa5VZtA$kaU+xbQSsMaZsH98sqoaGg' #秘钥
参考: